
Introduction
The SD-WAN page gives you full visibility and control of the Cisco Meraki next-generation firewall’s features, including WAN Connectivity status, Ports status and settings, and Web Application Control.
You can easily prioritise, set bandwidth limits or fully block network traffic for specific applications or an entire category.
Portal and Device summary
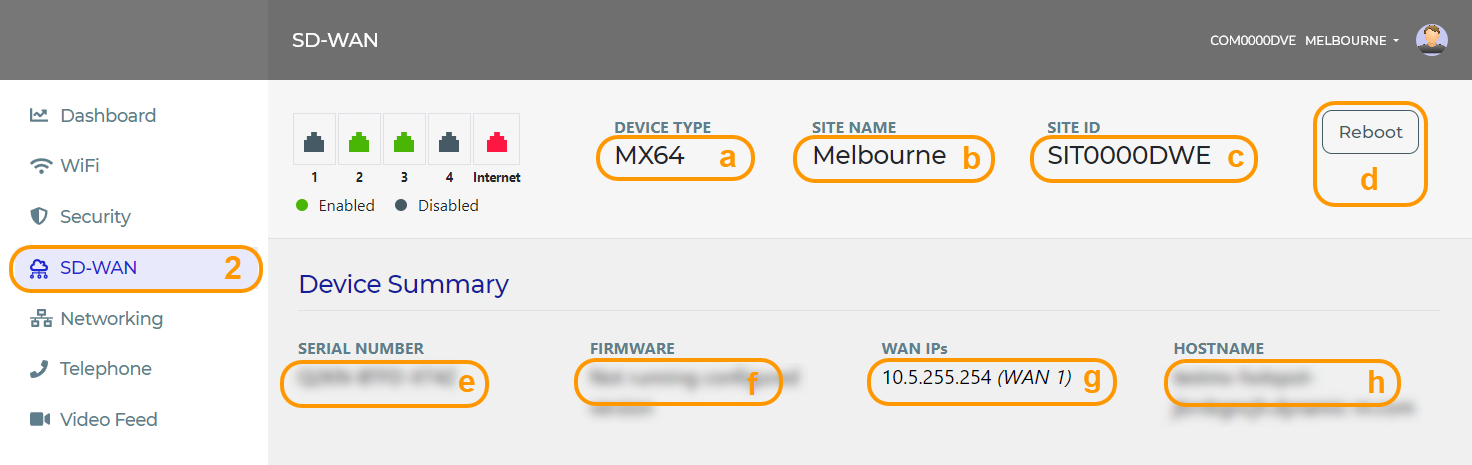
In the SD-WAN portal you'll be able to see the information about the device (Meraki MX) as below;
To view the portal and device summary;
- Log on to your account
- Navigate to SD-WAN;
In here- DEVICE TYPE
- SITE NAME
- SITE ID
- Reboot
- SERIAL NUMBER
- FIRMWARE
- WAN IPs
- HOSTNAME
Port Information
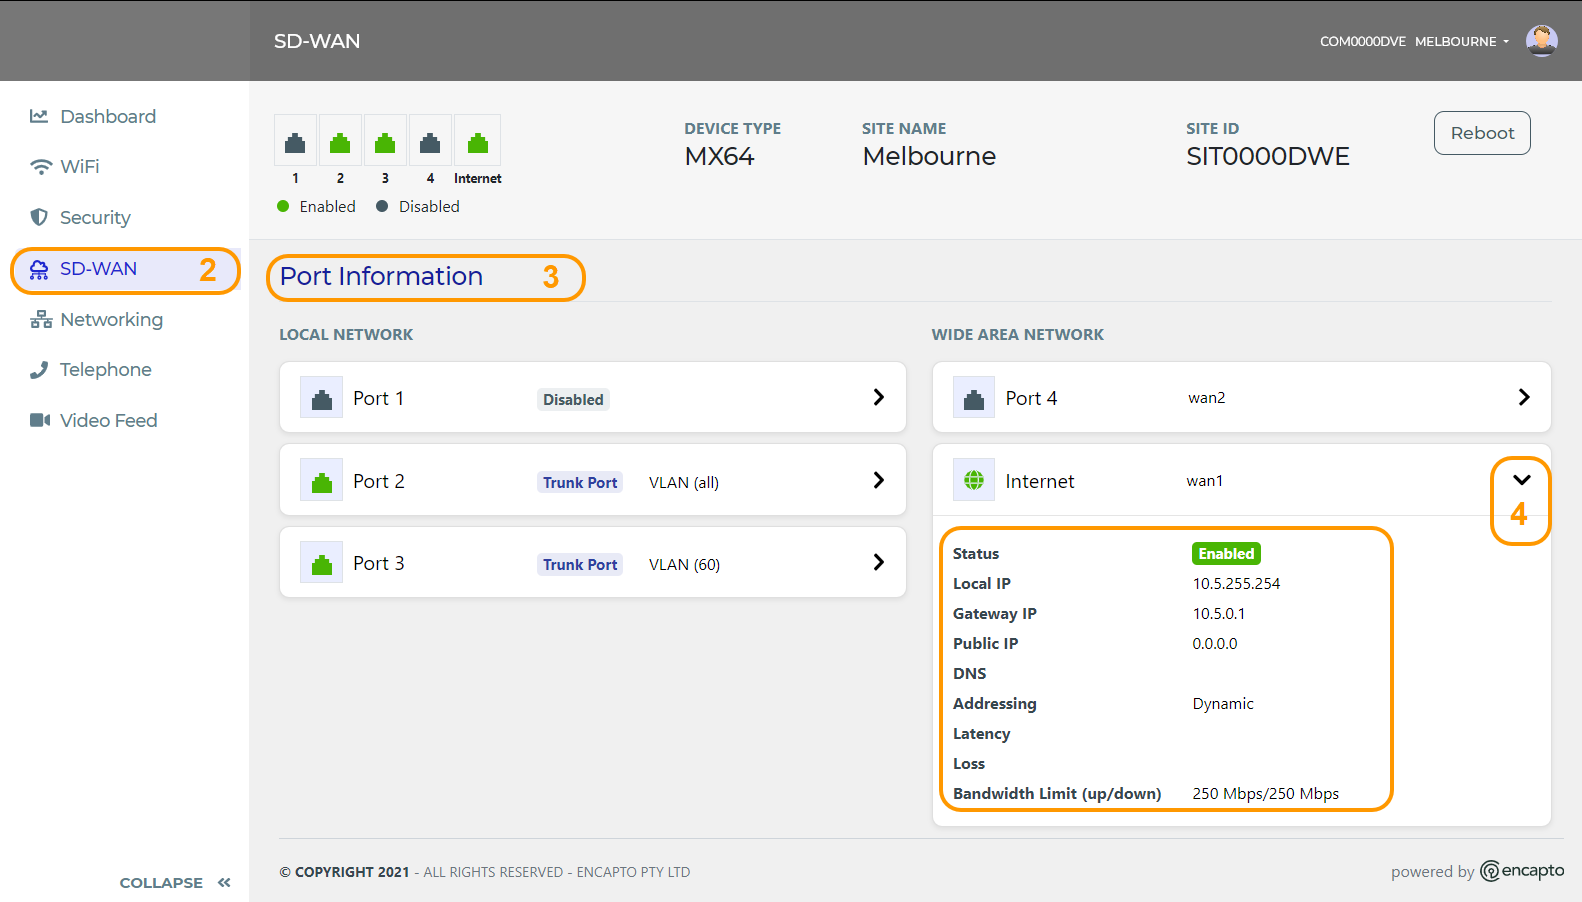
Port information sections will provide the information of all the ports of the Meraki MX device on your site.
WIDE AREA NETWORK (WAN)
In here you'll be able to view a detailed WAN port summary of the device,
To view WAN port information;
- Log on to your account
- Navigate to SD-WAN
- Scroll down to the Port Information section
- Expand the WAN port to view;
- Status
- Local IP
- Gateway IP
- Public IP
- DNS
- Addressing
- Latency
- Loss
- Bandwidth Limit (up/down)
LOCAL NETWORK (LAN)
To view and edit LAN port information;
- Log on to your account.
- Navigate to SD-WAN
- Scroll down to the Port Information section
- Expand the relevant LAN port
- Here you can view the current configuration
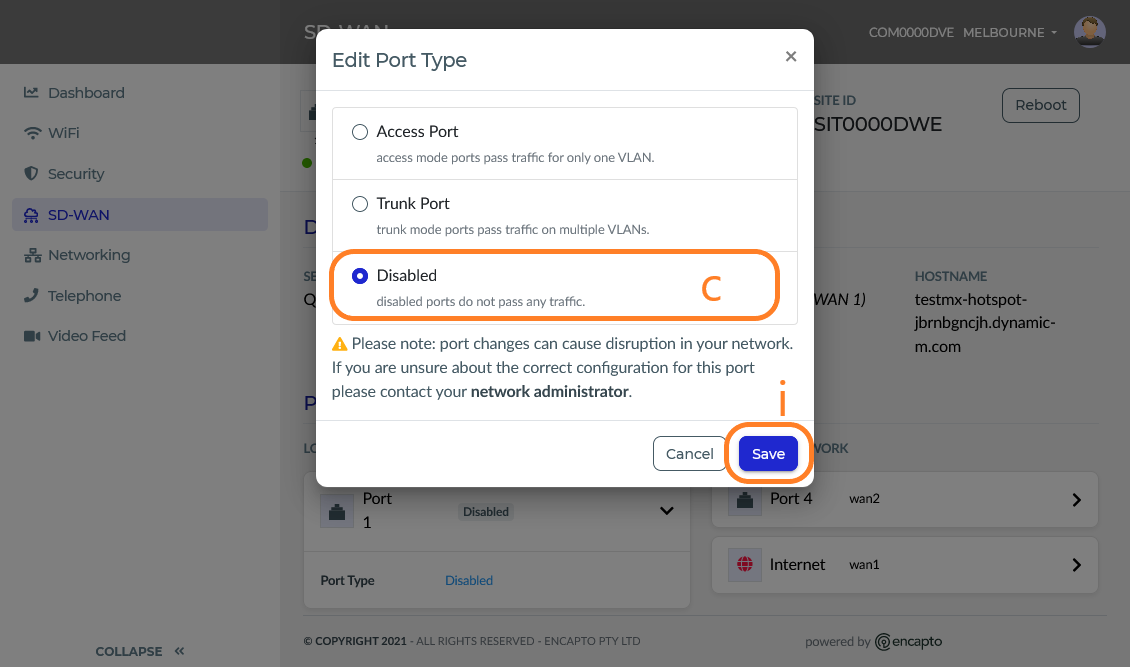
- To edit click on the Port type

- Select the port type;
- Access Port - access mode ports pass traffic for only one VLAN.
- Click Next
- Select the VLAN ID from the dropdown list
- Click Save
- Trunk Port - trunk mode ports pass traffic on multiple VLANs.
- Click Next
- Select the Native VLAN ID from the dropdown list
- Tick Allowed VLANs (multiple)
- Click Save
- Disabled - disabled ports do not pass any traffic.
- Click Save
- Click Save
- Access Port - access mode ports pass traffic for only one VLAN.