
Getting started
Encapto MSP can integrate with ConnectWise Manage - this comes with the following features:
- Brand you own self service portals for your customers. Empower your customers to make simple changes and have better visibility of the service you provide; while reducing your support effort for day to day changes customers need to make.
- Your customers can download their ConnectWise invoices, view and raise support tickets directly into ConnectWise.
- If you’re using Meraki, customers can view the device status and setup, as well as make simple changes (e.g. change SSID).
- Link your existing customers from ConnectWise and Meraki.
- Create you own branded, self-service customer webstore
- Link products defined in ConnectWise Manage to you branded, modern webstore in Encapto MSPs; incoming orders will automatically create/amend company agreements and kick off purchase flows.
- Your customers can create and view support tickets in their branded modern dashboard, managed by you in ConnectWise.
- Your customers can search and download their invoices
- Migrate your existing customers to give them a modern dashboard to enable them to have simple self-service tools - reducing your support costs and increasing their service satisfaction
- Keep your existing business processes in ConnectWise Manage - Encapto MSP will hook into it and turbo charge it!
Integration setup
The following details are required for the integration.
Company
This is your company identifier used when you log in to ConnectWise Manage.
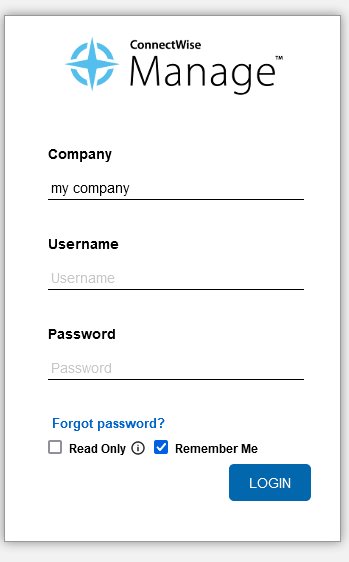
For instance, in this example the company is ‘my company’.
Site
This is the ConnectWise Manage site url. Copy it from your browser:

For instance, in this example, the site is: staging.connectWisedev.com
Create an API key
For Encapto MSP to integrate with ConnectWise, API keys are required to enable the systems to talk to each other.
You will need to create a new API member into your ConnectWise account, and an API key for that member.
It’s best practice for security to give the API key the minimum required privileges for the Encapto MSP integration. To do that, you will first need to create a custom role:
Create a custom role
- Click ‘System’ on the bottom left
- Select ‘Security Roles’
- Click ‘+’
- Name the role something descriptive, e.g. ‘Encapto MSP Role’
- Give access to the following permissions:
| Module | Item | Add Level | Edit Level | Delete Level | Inquire Level |
|---|---|---|---|---|---|
| Companies | Company Maintenance | ALL | ALL | ALL | ALL |
| Contacts | ALL | ALL | ALL | ALL | |
| Notes | ALL | ALL | ALL | ALL | |
| Finance | Agreement Invoicing | ALL | ALL | ALL | ALL |
| Agreements | ALL | ALL | ALL | ALL | |
| Invoicing | ALL | ALL | ALL | ALL | |
| Procurement | Product Catalog | NONE | NONE | NONE | ALL |
| Service Desk | Service Tickets | ALL | ALL | ALL | ALL |
| System | API Reports | ALL | ALL | ALL | ALL |
| My Company | ALL | ALL | ALL | ALL | |
| System Reports | ALL | ALL | ALL | ALL | |
| Table Setup | ALL | ALL | ALL | ALL |
Create an API member
- Click ‘System’ on the bottom left
- Select ‘Members’
- Select the ‘API Members’ tab
- Click ‘+’
- Fill in a descriptive Member Id and Name (the rest of this guide assumes you’ve set it as “Encapto MSP Robot”)
- In the “Role ID” select the “Encapto MSP Role” role you created in the previous step.
- Next, select ‘API Keys’ to create an API key for that new member
Create the API key
Now you have created a special ConnectWise Role and API member for the integration. The final step is to generate the API keys associated with that member.
If you’re not already on the open up the API member page for the “Encapto Robot”
- Click ‘System’ on the bottom left
- Select ‘Members’
- Select the ‘API Members’ tab
- Open the ‘Encapto MSP Robot’ member
Now to generate the keys:
- Click the ‘API Keys’ tab
- Click the ‘+’
- In the description, type something memorable, like ‘Encapto MSP Integration Key’
- Click ‘save’
- Copy and paste the Public and Private keys into the Encapto MSP onboarding wizard
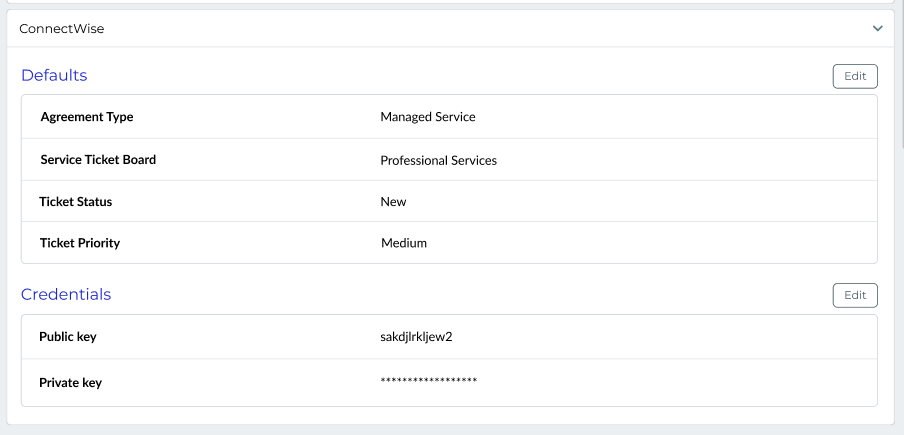
Default Agreement Type
The default agreement agreement type is used to automatically associate the default agreement with companies when making new purchases in Encapto MSP. New purchases will be added as additions to these agreements, which will trigger any relevant purchase flows for the partner, as well as updating the invoice for the customer.
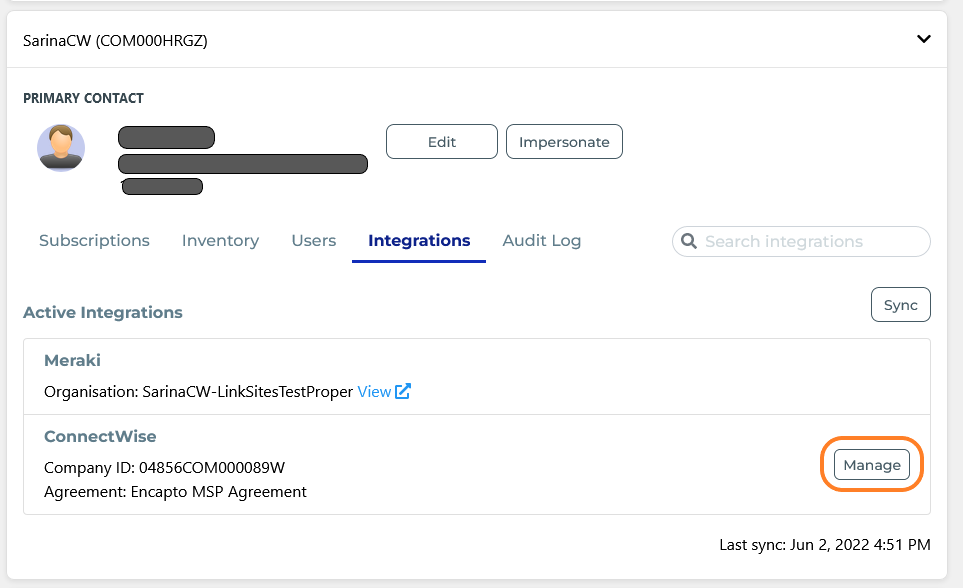
Customer agreements can be overridden by:
- Navigating to the specific customer: ‘Customers’→<selected customer>
- Selecting the ’Integrations’ tab
- Clicking ‘Manage’ in the ‘ConnectWise’ integration.
Default Service Board
This is the board that tickets will be raised against from the end customer dashboard (if your customers have the ‘ConnectWise Support Ticket License’ allocated to their sites.
Default ticket status
The default status for tickets raised against this board
Default ticket priority
The default ticket priority for tickets raised against this board.
Updating the integration configuration
If you need to update the integration configuration - this can be done by navigating to
‘Admin’→’Integrations’.
Please make changes here with care:
- changing the ‘Agreement Type’ will only affect new purchases.
- changing the default service ticket board, ticket status and priority will affect all customers.
- changing the credentials will affect all the calls Encapto MSP makes to ConnectWise Manage.
On-boarding Customers
Import an existing company
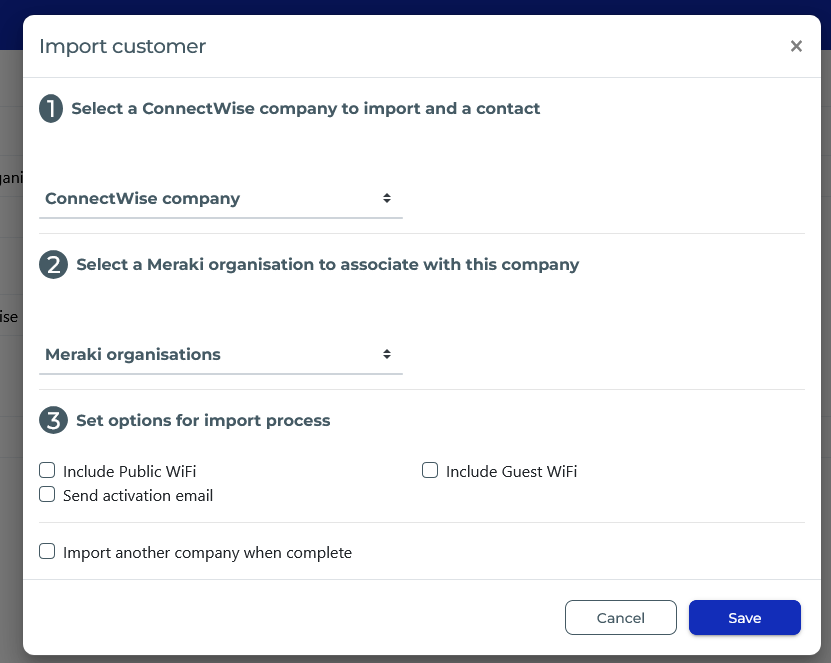
You can import companies from ConnectWise Manage using a convenient UI wizard. This will allow you to select an existing company from ConnectWise Manage, and (optionally) an existing Meraki organisation from Meraki to create an Encapto MSP dashboard for.
- Login using your MSP administration account
- Select “Link” on the left hand side navigation menu
- Click the “import” drop down on the top right hand side
- Select “Import existing customer”
The underlying process is the same as the one outlined here: 'Migrating existing customers to Encapto MSP’.
- The ConnectWise company to link - and the primary contact.
- The customer’s Meraki organisation to link
- The options are:
- Include ConnectWise customer support. This will automatically create a ‘ConnectWise Support Tickets License’ for every site, enabling the support ticket widget on the end customer dashboard.
- Include guest WiFi. This will include ‘Guest WiFi` licenses for every wireless AP found in the customers Meraki organisation
- Include public Wifi. This will include ‘Public WiFi’ licenses for every wireless AP found in the customers Meraki organisation.
- Send activation email. This will send a welcome email to the customer, allowing them to configure their password and give them access to the dashboard. This can be sent later via the ‘Customers’→<selected customer>→’Users’ page.
- ‘Import another company when complete’ upon successful submission, this will automatically show this same form again so that you may quickly link another customer.
Bulk link via CSV
You can use the method described here: 'Migrating existing customers to Encapto MSP’ to bulk import your customers from ConnectWise into Encapto MSP - noting that there are two ConnectWise Manage related columns:
- CONNECTWISE-ID: The company identifier in ConnectWise Manage
- SYNC-CONNECTWISE-SUPPORT - Whether to automatically create ConnectWise Support Ticket licenses for each site found for the company. This will enable the support ticket widgets on every enabled site of the customers Encapto MSP portal.
Product configurator with ConnectWise Manage
Encapto MSP can automatically append purchases to customer agreements in ConnectWise. This works by linking the inventory items in Encapto (link) to the products items in ConnectWise.
Similarly, when creating plans in products for the webstore (link to webstore), you can link each plan to a product of type (billed product type) in ConnectWise. The product linked to the plan is the one that will have the billed amount. Whereas each item included in the plan will be marked as (...) in the agreement, as it is bundled with the plan.
The end result is whenever customers make a purchase of a plan, the customer agreement will be added by:
- Adding a ‘plan’ product with the monthly billing amount
- Adding a ‘plan once off’ product with the once off / setup cost amount
- For each item included, if that of type ‘inventory-type’ in ConnectWise, then:
- adding a ‘’ non-billable entry with (blah) ticked for a single month period
- add the same non-billable entry, but with (blah) not ticked for the remaining months. This
- This ensures that any associated purchase/warehousing flows in ConnectWise are kicked off once (in the first month) and the remaining months still show the item in the invoice, so the customer knows what they are paying for
- For each item included, if that type is a ‘service’ type in ConnectWise, then:
- add a ‘’ non-billable recurring entry in the invoice
Automatically creating agreements
For new customers, Encapto can automatically create agreements when they purchase products through the webstore. This is configured in the product page (here). Existing customers will have their purchased items added to their existing agreement.
Changing which agreement to automatically add to on the customer
The customers agreement is configured on their customer page, under the integrations tab. This is the agreement that is added to whenever they make purchases.
You can change it to another agreement, but note that this will affect future purchases and not current. If you wish, you can move the relevant items to the new agreement in ConnectWise manually.
Customer Portal
This ConnectWise integration with Encapto MSP allows your customers to do the following in their portal:
Customer Support page per site, allowing them to raise and view support tickets.
Invoices page on the 'All Sites' view, allowing them to view and download invoices.